Unzip it to a folder under your project (For example, “{your_project_folder}\Assets”). Then a folder named “Teripic_{version_number}” will be created. This folder contains a “Common” folder for files common to every texture, and an individual texture folder for files unique to each texture. If you want to use more than one texture in your project, just unzip its individual texture folder only to the already existing “Teripic_{version_number}” folder.
Open your project in Unity.
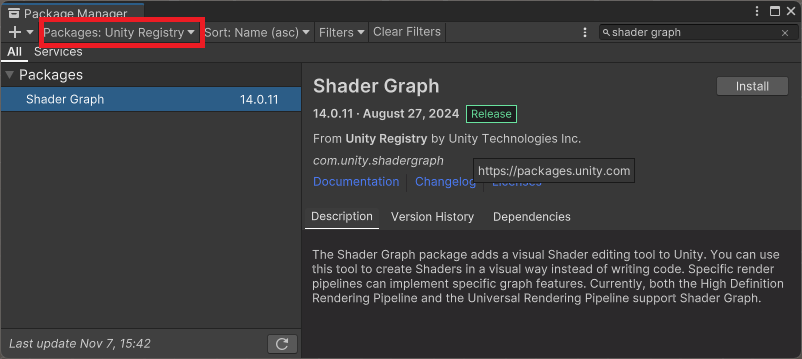
If your project uses the Universal Render Pipeline(URP) or High Definition Render Pipeline(HDRP), you can proceed to the next step. In case of the Built-in Render Pipeline, the Shader Graph package should be installed first. Open the Package Manager window(Window -> Package Manager in the Menu bar), select Unity Registry from the Packages drop-down menu, search “shader graph” and install it.
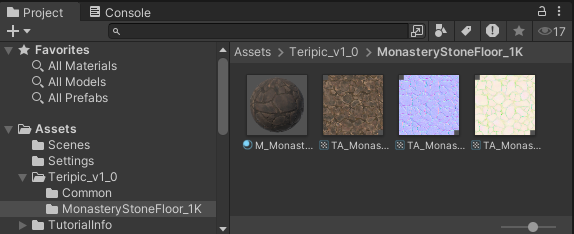
Check whether assets are correctly imported in the Project window. There should be 1 Material starting with the “M_” prefix and 3 Texture 2D Arrays(Diffuse, Normal, ORD) starting with the “TA_” prefix, under “Teripic_{version_number}\{texture_name}” folder.
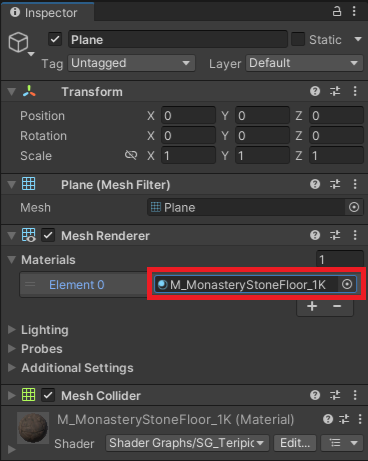
Assign the material to the target 3D object by changing the Materials property of that object in the Inspector window, or directly drag-and-dropping the material from the Project window to it in the Scene window.
The number of tiling and the mipmap bias can be configured in the material’s Inspector window. Please note that the exponential mipmap bias(=2(MipmapBias)) is used. For example, the ExpMipBias value of 0.5 = 2(-1) is equivalent to the conventional mipmap bias value of -1, so that the calculated mipmap level will be subtracted by 1.
Unreal
Download a compressed texture file for Unreal.
Unzip it to the Content folder of your project (“{your_project_folder}\Content”). Then a folder named “Teripic_{version_number}” will be created. This folder contains a “Common” folder for files common to every texture, and an individual texture folder for files unique to each texture. If you want to use more than one texture in your project, just extract its individual texture folder only to the already existing “Teripic_{version_number}” folder.
Open your project in Unreal.
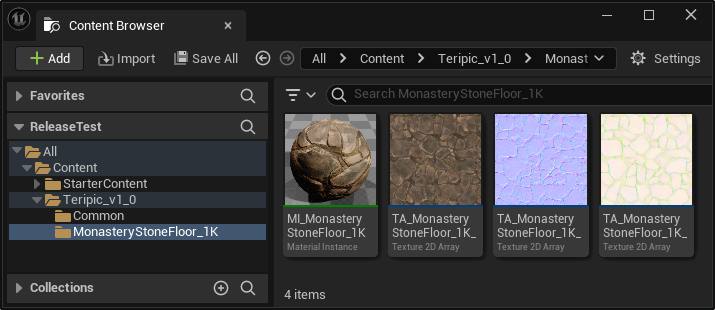
Check whether assets are correctly imported in the Content Drawer. There should be 1 Material Instance starting with the “MI_” prefix and 3 Texture 2D Arrays(Diffuse, Normal, ORD) starting with the “TA_” prefix, under “Teripic_{version_number}\{texture_name}” folder.
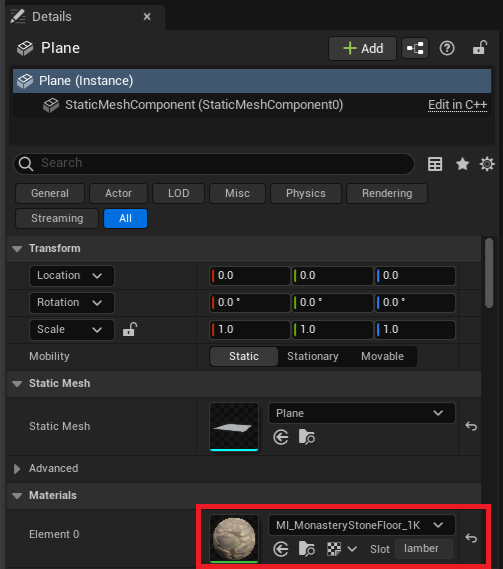
Apply this material instance to the static mesh or landscape by setting its Materials-Element or Landscape-Landscape Material in the Details panel.
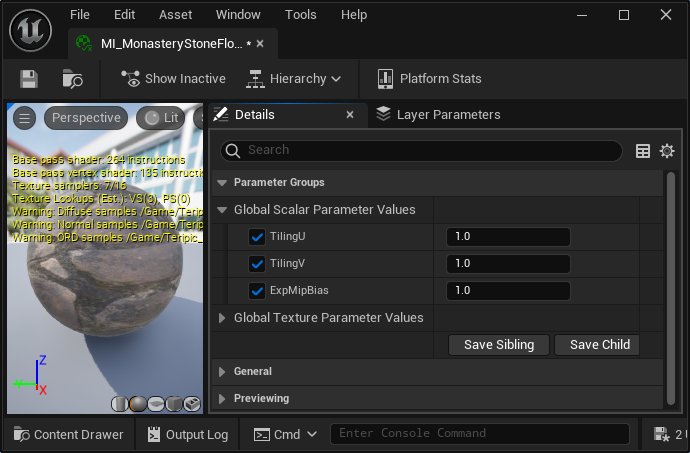
The Material Instance Editor can be opened by double-clicking the material instance in the Content Drawer, and the number of tiling and the mipmap bias can be configured in the Global Scalar Parameter Values section in its Details panel. Please note that the exponential mipmap bias(=2(MipmapBias)) is used. For example, the ExpMipBias value of 0.5 = 2(-1) is equivalent to the conventional mipmap bias value of -1, so that the calculated mipmap level will be subtracted by 1.
Blender
Download a compressed texture file for Blender.
Unzip it to a folder under your project. Then a folder named “Teripic_{version_number}” will be created. This folder contains a “Common” folder for files common to every texture, and an individual texture folder for files unique to each texture. If you want to use more than one texture in your project, just extract its individual texture folder only to the already existing “Teripic_{version_number}” folder.
Open your project in Blender.
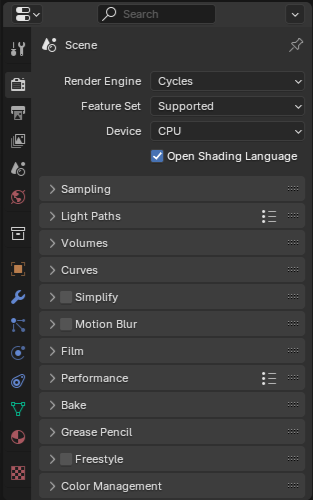
In the Render tab of the Properties editor, set Render Engine to Cycles and check “Open Shading Language”.
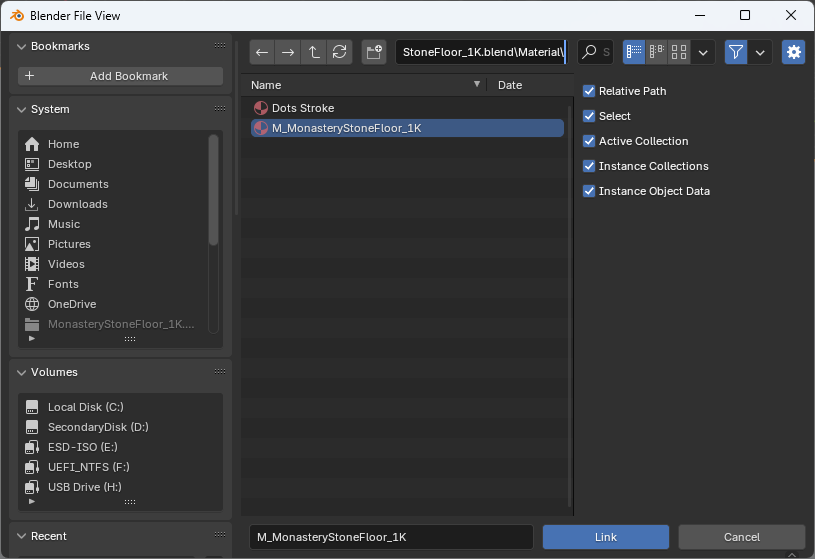
Click File -> Link in the Menu bar and navigate to the individual texture folder extracted earlier in the File Browser. Then double-click the blend file, Material folder and finally the material, whose name starting with the “M_” prefix, to use it in the current project.
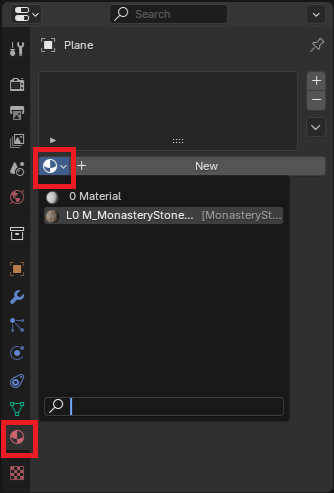
Select the mesh you want to apply the material to, and assign it in the Material tab of the Properties editor. Note that the “L0 ” prefix is added to the material name, indicating that it is a linked material.
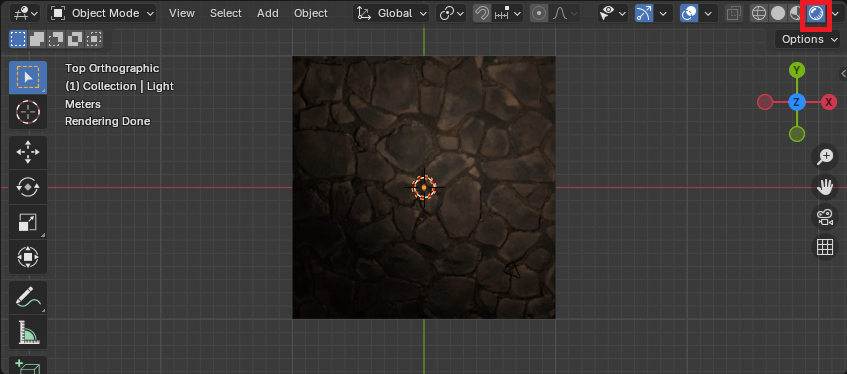
Set Viewport Shading mode to Rendered(This is needed to use Open Scripting Language) to see the result.
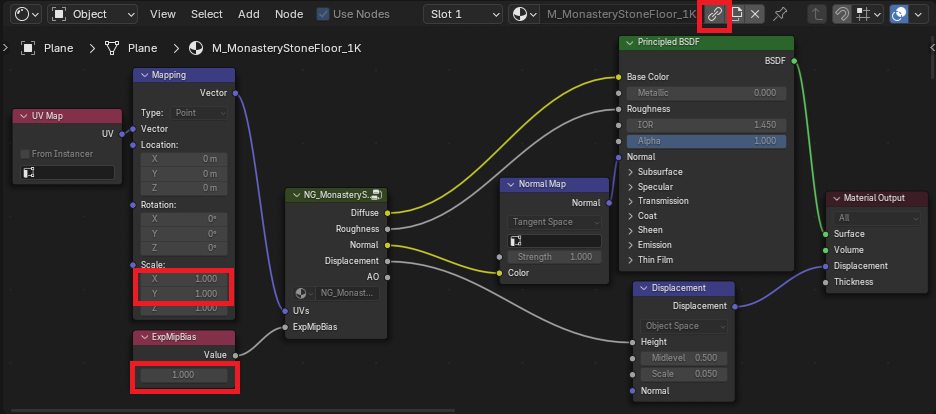
If you want to edit the material, click the Shading tab at the Topbar to use the Shader Editor. Initially, the shader graph of the material cannot be edited as it is linked from the other blend file. To edit, you should make it local first, by clicking the chain button at the top of the Shader Editor. Then the number of tiling and the mipmap bias can be configured by changing Scale X/Y values of the Mapping node and the ExpMipBias node value respectively, in the Shader Editor. Please note that the exponential mipmap bias(= 2(MipBias)) is used. For example, the ExpMipBias value of 0.5 = 2(-1) is equivalent to the conventional mipmap bias value of -1, so that the calculated mipmap level will be subtracted by 1.